
Student Productions
Scroll down to view some samples of Digital Media work I’ve done with my students.
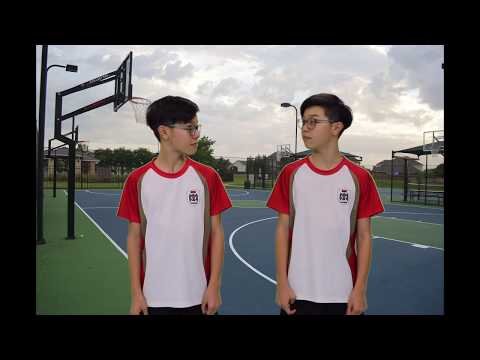
Student News Broadcasts
One of the most engaging activities for students in any media programme is a Student News broadcast. My recommendation is producing a broadcast that is once a week that is released at the same time/day every week where students are given the opportunity to act as news anchors for their school and report on weekly and upcoming events.
Depending on how you organise your club, students could also have the ability to rotate through a variety of roles in each broadcast. These roles could include: camera operators, teleprompter operator, scriptwriters, editors, and even boom mic operators, depending on the equipment you use. For best results, film students in front of a green screen, while sitting at a desk with a green cloth on it. Then the desk and background can be removed and replaced with a virtual news studio and news desk.
Click here to view the full collection of broadcasts that I produced with students, and don’t forget to catch one of the blooper reels at the end of an episode!
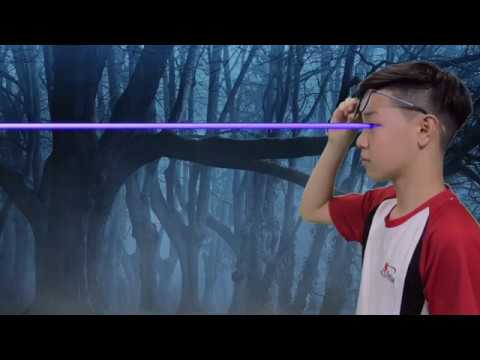
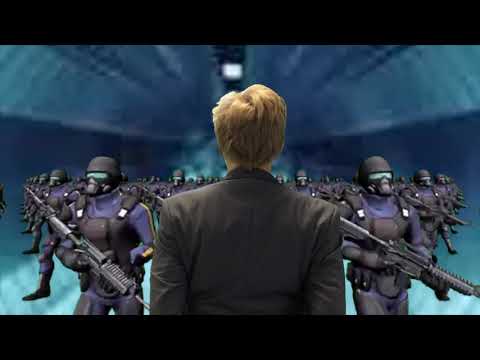
“Super Hero” Short Stories
A project popular with all ages is a “Super Powers” short story. These projects are great for helping students understand the process of “compositing” and adding visual effects to their videos. These projects can be as complex or as simple as you’d like, and as long or as short as you like. Students will need to find their visual effects in advance, then think about how to act while filming so that they are pretending the super power is happening while they are acting, while taking the camera angle, perspective and depth of the original visual effect to match it to what is happening on screen. A great place to find some free visual effects is Production Crate.
Feel free to browse a collection of full student videos below.


“FAUX Movie TrailerS”

In this project, students in my media programme produce “Faux” movie trailers using the built-in trailer creator in iMovie. To be successful in this project, students must first pitch an idea to their group for a fictitious movie, then plan possible shots that might be seen in a trailer for their movie.
They then create a detailed shot list and film each of their shots and prepare their shots to be used in the template. Students must stay within the boundaries of their chosen template and therefore must learn to utilise their shot list to be successful in this project.
Students are also encouraged to add additional special effects to their shots learned from previous lessons in my classes to increase the overall production quality of their final product. These may include green screen effects, sound effects, or additional visual effects, and can be edited in iMovie, then exported with the effects, then reimported into the trailer template.
Short FilmS
The pinnacle for any Film & Media Programme is the Short Film. These projects are typically at least 10 minutes in length and require a thorough understanding of all aspects of the filmmaking process to be successful in this project. To successfully complete a project of this magnitude, students should create a collection of documentation during the Pre-Production phase to help guide them through the filming and editing processes. This documentation could include a script, screenplay, blocking diagrams, storyboards, shot lists, prop lists, call sheets, filming schedules, etc.
During the filming process, students must consider camera angles, file management, equipment management and a multitude of other aspects of the Production phase. The planning they complete in the Pre-Production phase will be integral to help guide them through this process. Once filming is complete, students begin to edit their project and bring their film to life. More advanced students will want to think about colour correction, adding sound effects (both diagetic and background), as well as music to help elicit the right emotions from the audience. Projects of this scope require very close support, and/or a high degree of maturity in your students.
Digital Music Productions


Students in my media programme learn how to use professional music production software to produce electronic music from various genres of their choice. In this project, students have the choice to create their own productions or attempt to reproduce an existing song using Logic Pro X. Along with improving a student’s understanding of the software itself, students learn a variety of musical skills in the process, such as pitch recognition, rhythm, timing, instrument knowledge, and many others.
JUMP CUT VIDEOS
A "Jump Cut" is a video editing trick that can be accomplished with a little bit of planning and well timed edits. The purpose of this project is for students to learn how to add a little #MovieMagic to their videos and build some basic #DigitalStorytelling skills without any special effects, or fancy equipment or editing software. This project could easily be accomplished on an iPad with iMovie.
Split screen music videos
A split screen music video is always a fun challenge and never ceases to impress. On your right is an example of a project that I completed with elementary music students I challenged to learn Star Wars theme songs on their recorder.
When producing a project of this magnitude, there are a number of things that need to be taken into consideration. These include, sync, background noise, and a guide track. I have written a full article describing the process and challenges relating to producing a video of this nature.
In this particular video I produced the backing tracks in Logic Pro X, edited the final video in Final Cut Pro, and mixed the audio recordings in ProTools. Skim to the end of the video to see a “behind the scenes” of the process.
Scratch coding Animations
An exciting cross-curricular animation project is creating animations through the free Scratch coding website. For this project, students learn the basics of block coding to complete this project, then “export” their animation as a final video.
Currently, there is no official export function in Scratch. Therefore, students need to simply screen record their finished animation then import that screen recording into a piece of video editing software like iMovie or Final Cut Pro to add music, sound effects, and recorded dialogue to complete their projects.
Google Slides ANIMATIONS
Students in my media programme learn the basics of “Cel Animation” through the use of free and accessible resources like Google Slides. Students learn how to create their animations, frame-by-frame, then are taught to edit their animation with supporting visual effects, sound effects and music to improve their final product.
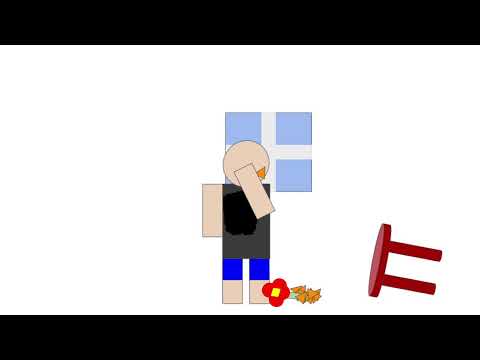
stop-motion animations
Students in my media programme learn the basics of stop-motion animation and are able to demonstrate their learning through the production of various independent LEGO movies.
To support their productions, students are taught how to add visual effects, use green screens, and create a full audio mix of music and sound effects to assist in their creation of their imaginary world.
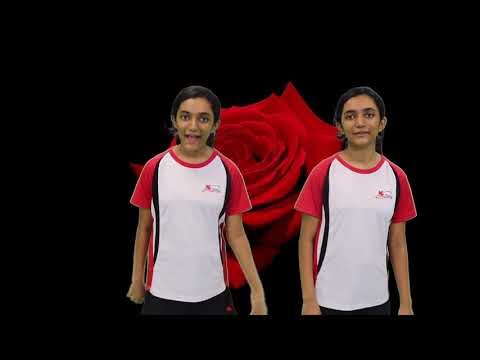
Music Videos
For another cross-curricular project in my media programme, students can choose to produce a music video to accompany their own digital music productions. This is a large culminating assignment that involves producing a piece of digital music in professional music production software Logic Pro X, then planning an outline for a story they’d like to tell in their music video. This project also involves filming their scenes, editing, and adding any visual effects, sound effects and animations where needed.
For this project students can either choose to fully reproduce a song within their music software, or create their own production. In this example, students chose to reproduce the popular meme song “Shooting Stars”, then wrote a story involving a star that revolves around the earth as the main energy source for the planet. In their story, the star is stolen by an alien, and they show their journey to retrieve the star through their video.
Forced Perspective Projects
One of my projects for my media students that is a student-favourite is my Forced Perspective project. This project requires little understanding of the filmmaking process, and can easily be completed in a short amount of time with only an iPad. Forced Perspective is a camera trick that has been used since the beginning of filmmaking and is still in use today in popular movies, such as Harry Potter, Lord of the Rings, Elf, and many others.
Throughout the lesson for this project, students learn how to manipulate perspectives in front of the camera by changing distances. Students are challenged to demonstrate their understanding by coming up with their own Forced Perspective video. This video is a compilation of the fun ideas students have come up with, along with the exemplar I used with my students during my lesson.
Mockumentary/infomercials
When teaching new students in my media programme, I often start with very short projects that are between 5 and 30 seconds in length. I use these short projects as a method of teaching a large number of concepts in a short amount of time, as students can work their way through a lot of short-form projects very quickly. As I continue to introduce more and more concepts to my students and my students become more competent with the filmmaking process, one of the longer projects I assign is often a “mock-informercial” project.
This project requires students to understand a variety of concepts in all phases of filmmaking to be successful in this project and are graded on their ability to demonstrate their understanding a multitude of concepts including: writing a script and screenplay; blocking and storyboarding; filming; lighting; editing; adding music and sound effects; and mixing their final audio track.
In addition, students are taught to use reference material to research their genre, (in this case, the mockumentary / infomercial genre), then use their reference material to develop their project with the correct style.
EDITING TRICKS AND ILLUSIONS


Students in my media programme also learn a variety of editing tricks and illusions that can be easily achievable with some creative editing in Final Cut Pro. The examples on the right both involve a technique called “Masking” which allows you to remove a specific part of the screen. This is different than Cropping as Masking allows you to designate exactly which part you would like to remove.
Cloning Projects

One of my most popular concepts that I teach my media students is how to clone themselves in their videos. In this project, students learn the technical requirements of digitally cloning themselves, along with the amount of planning that is required to successfully complete this project. Learning how to effectively plan out their scenes and timing their conversations are important components of this project.